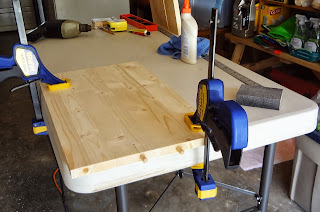
Vacation week at home – what better time than to do a
project that has been on the back burner forever. I’m determined to make a bench for my
entryway. I have a bench that belonged
to my step-father but it’s 44 inches long and I can’t have anything over 38 inches
in that space (and that is pushing it).
But I’ve always loved the keyhole legs on that bench.
So off to Lowes I go and get wood, pegs, feet – all the
little things I need to make this very simple box bench happen. Sit down and actually draw a picture figuring
if I plan it, I’ll have to measure correctly without just doing that as I go
which is my usual mode for creating.
After carefully measureing each piece exactly as planned before cutting, I figured out where the holes should be drilled
for the pegs. All ready to go.
Mr. Whimsey decided I needed help and he would drill the
holes – oh my. There were a total of 24
holes/pegs planned. Can Mr. Whimsey
hold the drill straight while he’s drilling?
If you look at the second to the last picture in the post – you’ll find the answer to
that. But we had holes and we had
pegs.
OK, next idea? “I
wish we could just cut some inches out of the bench we already have,” said
I. “Oh sure,” said Mr. Whimsey, “we can
do that.” “OK, I’ll get the circular saw
out and get the bench marked,” said I. “Oh
no,” said Mr. Whimsey, “I have this perfectly good table saw that is much
easier to use.” “Ah but…..,” said
I. “It will work – we’ll make it work!”
exclaimed Mr. Whimsey. Oh well I can
always cover it up with paint and a cushion and maybe not let anyone sit on it
went through my mind.
So after a test sit (yes it is sturdy enough to sit on as long as you aren’t jumping up and down on it), I sanded it, gave it two coats of white primer, and a coat of crackle.
Then because I knew it wouldn’t take much paint and didn’t
want to spend any more money on the bench project – I mixed my own paint. I had some paint left over from my bathroom
project
I covet one of those old fashioned looking
rectangular pillows with the piping all around and tufting that are cotton
stuffed…something like this only not in that color (I’m dreaming maybe a really
faded cream and blue ticking)…but for now a folded king-sized cotton quilt is
the perfect size and will have to do.
So here is the moral of the story. What you have can be used in many different
ways…shop from your house to find what you need…and know that whatever comes
out IS good enough – after all YOU created it!


